Jack Dickson
“PORTRAITS”
We had a fabulous demonstration from TV’s ‘Extraordinary Portraits’, ‘Sky Arts Portraits Artist of the Year’ and ‘Make it at Market’ artist Jack Dickson at our last meeting. The hall felt full of energy, enthusiasm and… the sussurous of pencils on paper in our interactive session. For our demo ‘report’ today we have the notes taken by one of our members during Jack’s demonstration. We love their observations and notes reflecting Jack’s brilliant and generous sharing of wisdom, anecdotes and artist tips
NOTES
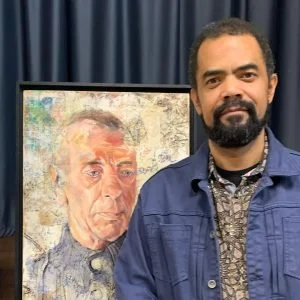
Jack’s daughter’s portrait (left) was painted on her favourite wall paper in oils.
The portrait of the woman was a layered photo montage printed in photo transfer paper with drawing and painting underneath.
He uses a lot of montage to convey things that are important to the sitter.
Jack started with a long pencil to form a grid and map out where things are creating relationships between things.
Measure the distances between features and shadows. Not initially trying to get a likeness.
Use self portrait to try out ideas and techniques. Try to take risks with them.
Now be playful. Torn brown paper. The aim is to create an interesting surface. Draws the outline again on paper which has been stuck on. Prit stick or pva glue.
Uses photos as a tool not an outcome. Maybe 3-30 photos and the final work will be an amalgam.
Fabric is a problem as the glue affects the absorption, so it’s a bit random what you get when you paint over it.
Don’t use odd numbers of things – rule of photography which applies in collage too.
Likes the portraitists Claudette Lawson, Sonia Boyce, Keith Piper, etc
Adds ink. Uses Quink – inks that use a dye work. Then uses bleach or sterilising fluid to change the colour.
Heat melts pritt stick, also not good with masking tape. (Dries the picture with a hairdryer).
Gesso is next layer. Good surface to hold pencil.
It’s important to find which bits of the face you need to leave. Suggest things or features rather than detail them. You can then find the image again in the surface. There is an eye showing through for example in his picture and graphite can shine through black paint.
Using a 2H pencil goes over gesso to recover the drawing.
Avoids drawing round the lips. Draw the line between. Can do the top. Not the bottom lip, though maybe the shadow. The change in shades around lips can be subtle.
Usually works around the face, again and again bringing it slowly into focus and detail. And uses different media including water colours but you don’t know how it will react with the bleach. That’s the fun. This time will do only a portion of the picture.
Eyes tell us mood, expression. Sometimes in edge of mouth too. Spend time on them. Get position right. Does not draw bottom eyelid, not at first any way. Avoid too many harsh lines.
Begins to work with the surface to add in tones with the pencil. Shadow of the nose, the side of the face/cheek etc
Asked: How long? With a commission the final oil about 35 hrs. The prep – collage, sketches in person 2-10 hours, researching another c 35 hrs
Used the palate – loves raw sienna, cadmium red hue is dangerous! – you get to know your palate so sticks with the same one for dark or light skin.
Measuring and aligning mouth shadow with nose, eye pupil with edge of mouth.
Most people just want the big reveal at the end. Sometimes he talks about composition and shows a few designs to the client.
Now use 2B to quickly add hair in last few minutes. Block out tone with larger marks, then sculpt out individual hairs on top. Adding tone to reveal cheek bone. Build the tone rather than going for the right tone straight away.
Picture is perhaps half an hour from being finished.
For more information: